The Musings, Pictures and Battle Reports of 40+ years of Wargaming experience.

Saturday, August 25, 2018

Rapid Fire! - Action in Normandy

     In our quest to find the perfect WW II rules (because we play this time period sooo infrequently) we decided to break out Rapid Fire! Rules for Rookies.  I have the full rules but since we haven't played in forever, we broke out the simplified version.  My miniatures are based for Flames of War so we did the best we could to match the number of figures per unit and then just used markers for causalities till a stand came off.

As normal, we fought in the hedgerow country of Normandy.  United States versus the Germans.

 The Americans (Kevin and Mike) entered from the right side of this picture.  The Germans (me) had the Infantry formations on the board with armor reinforcements entering from the left of the pic.  As you can see the US objective is to gain a foothold across the river, the crossroad being the main goal.

Mike's Command.  He gets a Tank company (3 of the Shermans.  The others are Kevin's), 3 regular strength Infantry Companies and a reinforced one.

Kevin's Command.  It mirrors Mike's. (Remember he gets a Sherman Coy too).  The main difference is the terrain they each had to navigate to get to me.

The German right flank.  An Infantry Coy and a Heavy MG Coy.  Behind them is an Anti-Tank attachment along with a Mortar unit.  Seen on the road near the top of the picture is 2 more German Infantry Coy as reserves.  

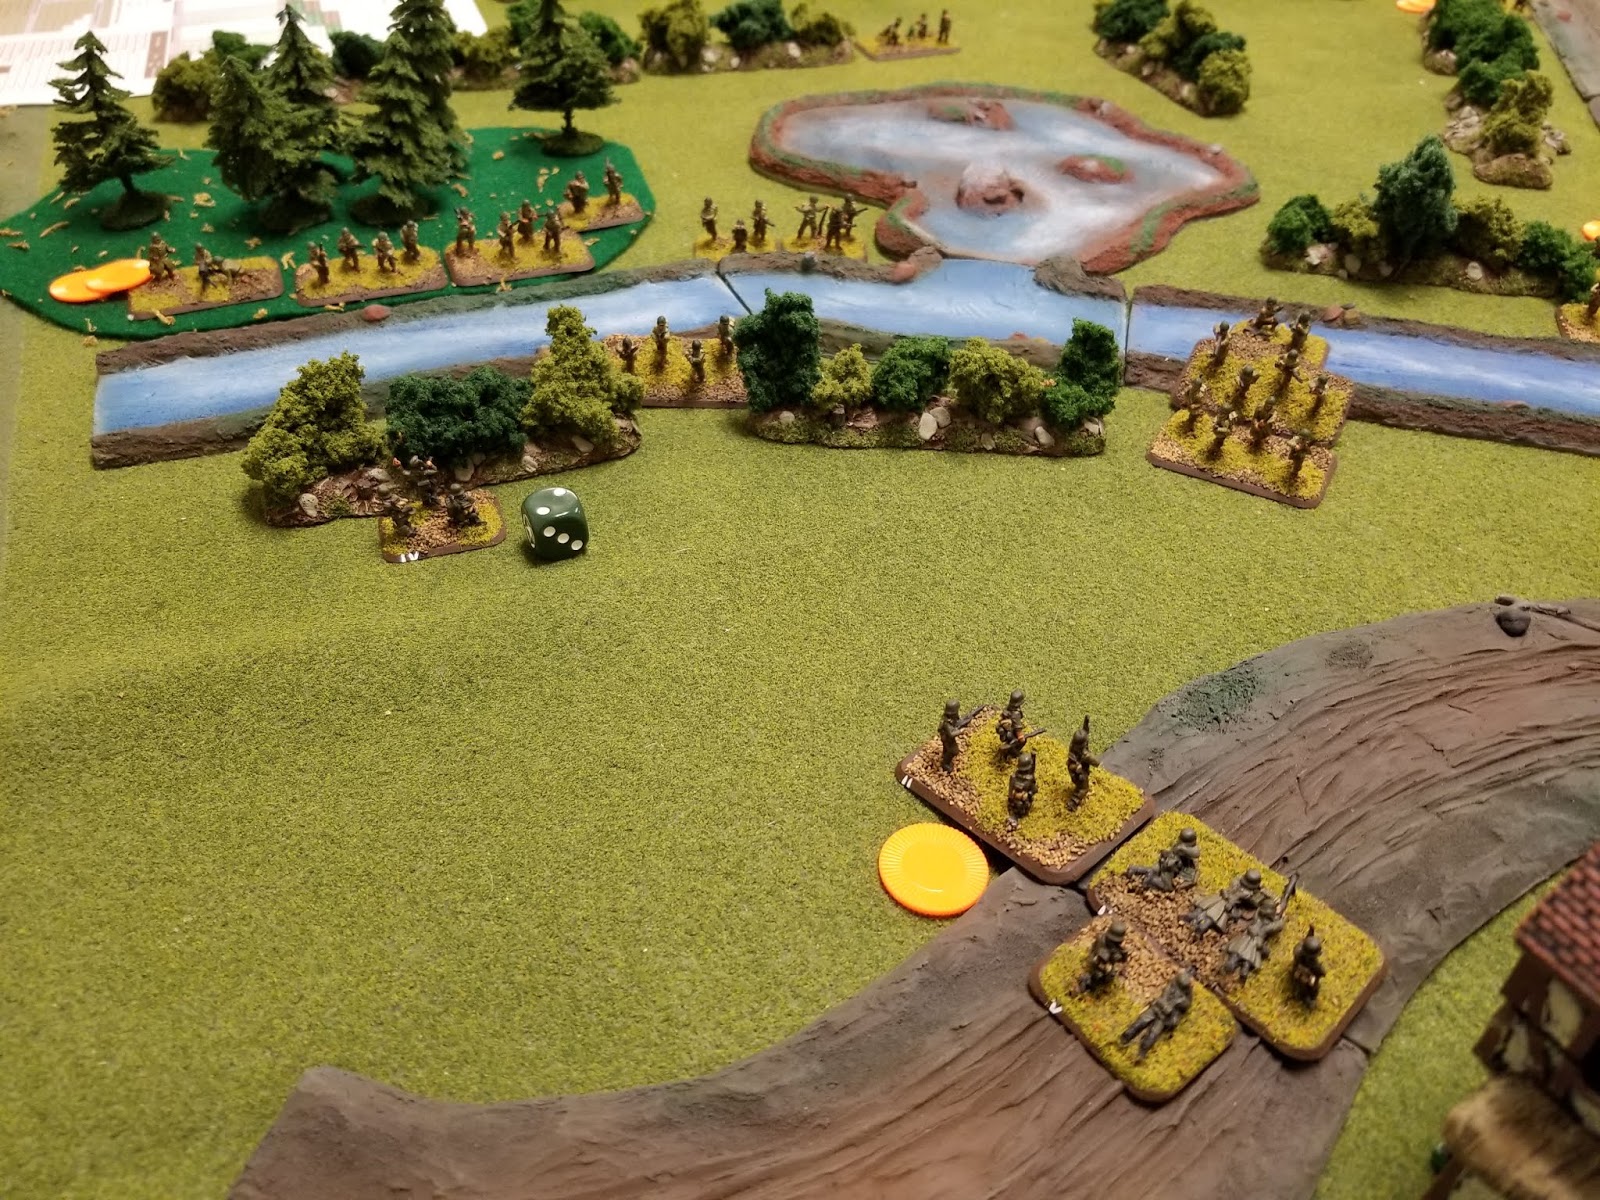
The German left flank.  2 Infantry Coy plus the Battalion HQ.  The voice in my head told me that the German units lining the river would be dug in (Hard cover).  But the words never came out of my mouth.....


Off board is a Pz IVh company and a StG IIIg company.  They are in reserve; first the StGs (on the German right) then the Pz IVs (down the road).  They are available one per turn, starting next turn using the FoW Reinforcement rules.

Now that we're set, the battle commences...... 

 Kevin's units move out.  The Shermans with an Infantry escort follows the road.....

 The rest of his Infantry slogging it cross country.

Mike's Infantry move up the middle while his Sherman Coy trys to turn the German right flank along what we call "the jello barrier".

It sounded like a good plan....but I rolled double sixes on my first reinforcement roll.  The StG IIIs rolled in and light up one of the Shermans!!  First blood to the Germans.

Kevin pushed his command hard.  My mortars rained VERY ineffective fire down on his men.  I don't think I hit with the mortar the whole game.  And thanks to me forgetting to dig my units in he began to eliminate my defenders.

On my next reinforcement roll I rolled a 5 and a 6, so my Pz IVs arrive, just in time.  The Infantry reserves I had in the town move to my left flank to help counter Kevin's push.  On the American right Mike's tanks dueled with my Armor, I got another kill......

While Kevin's and my Infantry engage, he tries to force the bridge with his Shermans....BOOM!...

Having lost a second Sherman Mike pulls his remaining armor into the cover of the woods.  He's hoping to add it's firepower to the action involving the center and the bridge.  I move one of my Panzers to counter him.
 
An overhead view from a circling L-4 Bird Dog.  One of the German's left flank Infantry Coys has disappeared.  Kevin's Infantry is about to attempt to cross the river.  A Sherman has forded the river and is engaging the Pz IVs in the town.  On the German right Mike's Infantry is about to rush across the open fields and try to pressure the German defenders.
 
The German left:  The American Infantry has crossed the river.  The German HQ was engaged and took losses.  The German Infantry reinforcements are fully committed.
 
The center:  The US Anti-tank fire has finally scored on the German Armor.  Mike's Infantry inflicts causalities on the German defenders.  Lt. Spears (one of Kevin's HQ stands) directs the battle while taking shelter behind the burning Sherman on the bridge.
 
The US left:  Mike is having a hard time getting across the field.  He pulls his Sherman out of the woods, it has come under fire from both the German AT gun and the Pz IV.  The German Infantry is being whittled down.
 
The Bird Dog circles back behind the US lines:  The end is approaching.  The Americans are mostly in control of their river crossing.  The last of the German Defenders near the town were finished off this turn.  On the US left a huge gap has appeared in the German river line.  It would only be a matter of time before Mike could push his Infantry up and over the river.  The 2 German StG IIIs can still be seen on the left of the photo.  But they were destroyed later this turn.  It was at that point I gave the General Order to my defender to abandon their positions and make for the rally point....
 
A close-up of the end.  On my orders my men spiked their guns and mortar tubes.  My tanks reversed away from danger and they all headed for the rear area.  The American river crossing was made, but not without cost.  

It was a really fun game.  We all agreed that we needed to play WW II more and Rapid Fire! is simple enough that we shouldn't have to spend half our game time reviewing the rules.  Next time I think we'll try the full rules out.

Thanks for reading 😃


2 comments:

  1. Enjoyed the post, thanks for sharing, will now see if I can track down some RF 'Rookies' documents.

    ReplyDelete
  2. Got this link if anyone is interested.
    https://www.scribd.com/document/24469877/Rf-for-Rookies

    ReplyDelete