The Musings, Pictures and Battle Reports of 40+ years of Wargaming experience.

Saturday, August 25, 2018

Rapid Fire! - Action in Normandy

     In our quest to find the perfect WW II rules (because we play this time period sooo infrequently) we decided to break out Rapid Fire! Rules for Rookies.  I have the full rules but since we haven't played in forever, we broke out the simplified version.  My miniatures are based for Flames of War so we did the best we could to match the number of figures per unit and then just used markers for causalities till a stand came off.

As normal, we fought in the hedgerow country of Normandy.  United States versus the Germans.

 The Americans (Kevin and Mike) entered from the right side of this picture.  The Germans (me) had the Infantry formations on the board with armor reinforcements entering from the left of the pic.  As you can see the US objective is to gain a foothold across the river, the crossroad being the main goal.

Mike's Command.  He gets a Tank company (3 of the Shermans.  The others are Kevin's), 3 regular strength Infantry Companies and a reinforced one.

Kevin's Command.  It mirrors Mike's. (Remember he gets a Sherman Coy too).  The main difference is the terrain they each had to navigate to get to me.

The German right flank.  An Infantry Coy and a Heavy MG Coy.  Behind them is an Anti-Tank attachment along with a Mortar unit.  Seen on the road near the top of the picture is 2 more German Infantry Coy as reserves.  

The German left flank.  2 Infantry Coy plus the Battalion HQ.  The voice in my head told me that the German units lining the river would be dug in (Hard cover).  But the words never came out of my mouth.....


Off board is a Pz IVh company and a StG IIIg company.  They are in reserve; first the StGs (on the German right) then the Pz IVs (down the road).  They are available one per turn, starting next turn using the FoW Reinforcement rules.

Now that we're set, the battle commences...... 

 Kevin's units move out.  The Shermans with an Infantry escort follows the road.....

 The rest of his Infantry slogging it cross country.

Mike's Infantry move up the middle while his Sherman Coy trys to turn the German right flank along what we call "the jello barrier".

It sounded like a good plan....but I rolled double sixes on my first reinforcement roll.  The StG IIIs rolled in and light up one of the Shermans!!  First blood to the Germans.

Kevin pushed his command hard.  My mortars rained VERY ineffective fire down on his men.  I don't think I hit with the mortar the whole game.  And thanks to me forgetting to dig my units in he began to eliminate my defenders.

On my next reinforcement roll I rolled a 5 and a 6, so my Pz IVs arrive, just in time.  The Infantry reserves I had in the town move to my left flank to help counter Kevin's push.  On the American right Mike's tanks dueled with my Armor, I got another kill......

While Kevin's and my Infantry engage, he tries to force the bridge with his Shermans....BOOM!...

Having lost a second Sherman Mike pulls his remaining armor into the cover of the woods.  He's hoping to add it's firepower to the action involving the center and the bridge.  I move one of my Panzers to counter him.
 
An overhead view from a circling L-4 Bird Dog.  One of the German's left flank Infantry Coys has disappeared.  Kevin's Infantry is about to attempt to cross the river.  A Sherman has forded the river and is engaging the Pz IVs in the town.  On the German right Mike's Infantry is about to rush across the open fields and try to pressure the German defenders.
 
The German left:  The American Infantry has crossed the river.  The German HQ was engaged and took losses.  The German Infantry reinforcements are fully committed.
 
The center:  The US Anti-tank fire has finally scored on the German Armor.  Mike's Infantry inflicts causalities on the German defenders.  Lt. Spears (one of Kevin's HQ stands) directs the battle while taking shelter behind the burning Sherman on the bridge.
 
The US left:  Mike is having a hard time getting across the field.  He pulls his Sherman out of the woods, it has come under fire from both the German AT gun and the Pz IV.  The German Infantry is being whittled down.
 
The Bird Dog circles back behind the US lines:  The end is approaching.  The Americans are mostly in control of their river crossing.  The last of the German Defenders near the town were finished off this turn.  On the US left a huge gap has appeared in the German river line.  It would only be a matter of time before Mike could push his Infantry up and over the river.  The 2 German StG IIIs can still be seen on the left of the photo.  But they were destroyed later this turn.  It was at that point I gave the General Order to my defender to abandon their positions and make for the rally point....
 
A close-up of the end.  On my orders my men spiked their guns and mortar tubes.  My tanks reversed away from danger and they all headed for the rear area.  The American river crossing was made, but not without cost.  

It was a really fun game.  We all agreed that we needed to play WW II more and Rapid Fire! is simple enough that we shouldn't have to spend half our game time reviewing the rules.  Next time I think we'll try the full rules out.

Thanks for reading 😃


Sunday, August 12, 2018

Bushy Run 2018 - Part Two

       On Saturday, August 11th the Bushy Run Battlefield just outside Pittsburgh was the venue for a one day Gaming event. 

 https://bushyrunbattlefield.com

     Linda and I made the trek over from SE Michigan to go play and see our friend Scott who was the Event Coordinator.  Unfortunately the event was rather unattended, only a contingent of three fellow gamers from the Youngstown Ohio region and Nick, a young man who was a Bushy Run Volunteer was there for the first of two games.  However for our second game we were joined by a gentleman named Lem and a young man named Jake.

     This game was presented by Scott using his terrain and figures.  It was set in 1846 during the First Anglo-Sikh War.  It was the Battle of Aliwal, that happened on January 28th of that year; we used the Blackpowder rules.


The British forces begin to deploy.
 
The Sikh forces begin assembling.  BIG gun in the foreground, smaller gun on the far hill.

Big gun with Akali forming around it.  They played a huge part in the fight.  The Akali.  Not the gun....

Sikh irregular Cavalry.  They did nothing for quite awhile.  Then ran away as part of a broken Brigade.

The Sikh right flank.  Strong with Sikh Infantry and 2 Camels with 1 pound guns.  And an artillery piece that pounded the British all game long.

The British left flank.

The British center.  Confident they will make short work of the enemy.

The British right.  You can see just off table the Lancers and other British Cavalry.  They enter when the Infantry moves out.
The general British advance.

On our left, my Akali crash into the British Red line, which proved to thin to hold.  As my casualties mounted my Akali refused to break.

The Sikh Infantry form into their own version of the Thin Red Line....

Sikh troops pour through the village.


The British Commanders fear no one.  "What's the shooting range again?"

As seen form the British lines.

The battle lines were drawn.  It was at this point the the Sikh Cavalry Commander unleashed the fury of his units!  With wild abandoned the Sikh cavalry charged straight through the 'No Man's Land'....into the teeth of the British guns!!  They were devastated......to such an extent that the entire Sikh Cavalry command broke and were eliminated....

Both my Akali units grind away at the British Infantry.  After we destroyed them the Lancers charged and we beat on them too!!

The British players receive the wraith of my wife's die rolls......

The final photo just before the end.  Just after this picture was taken the British center collapsed.  The tide of battle fell firmly away from the British and the Sikh's won the day.

Thanks very mush to the Bushy Run Battlefield for hosting this Game Day and to Scott for taking the time to organize it 😊

Bushy Run 2018 Part One

     On Saturday, August 11th the Bushy Run Battlefield just outside Pittsburgh was the venue for a one day Gaming event. 

 https://bushyrunbattlefield.com

     Linda and I made the trek over from SE Michigan to go play and see our friend Scott who was the Event Coordinator.  Unfortunately the event was rather unattended, only a contingent of three fellow gamers from the Youngstown Ohio region and Nick, a young man who was a Bushy Run Volunteer was there for the first of two games.  

     Another gentlemen was in attendance too, but he was not a gamer, he was a modeller.  He came to see what our hobby was all about.  He very politely observed us for our first game, had lunch then stayed for about 30 minutes into the second game.  We chatted about the similarities between our two hobbies.  He had even brought a small diorama that he had made for us to see.  Try as I might, he continued to refuse our offers to join in, he really just wanted to observe.

     Bob (sorry Bob, I don't know your last name) was kind enough to bring his 54mm All the King's Men AWI miniatures and he put on our first battle.  His friends Gary and Tom took control of the forces of King George III and Nick, my wife Linda and myself took command of the (soon to be triumphant) American troops.

     Using Bob's modifications to the free rules from All the King's Men, the battle featured various American and French units versus Hessian, Highlanders, Queen's Rangers and Indians.

What follows are the pictures I took with a few comments.  Enjoy.

 Some of the French Units begin to deploy.

 British Light Infantry screens a German Unit.


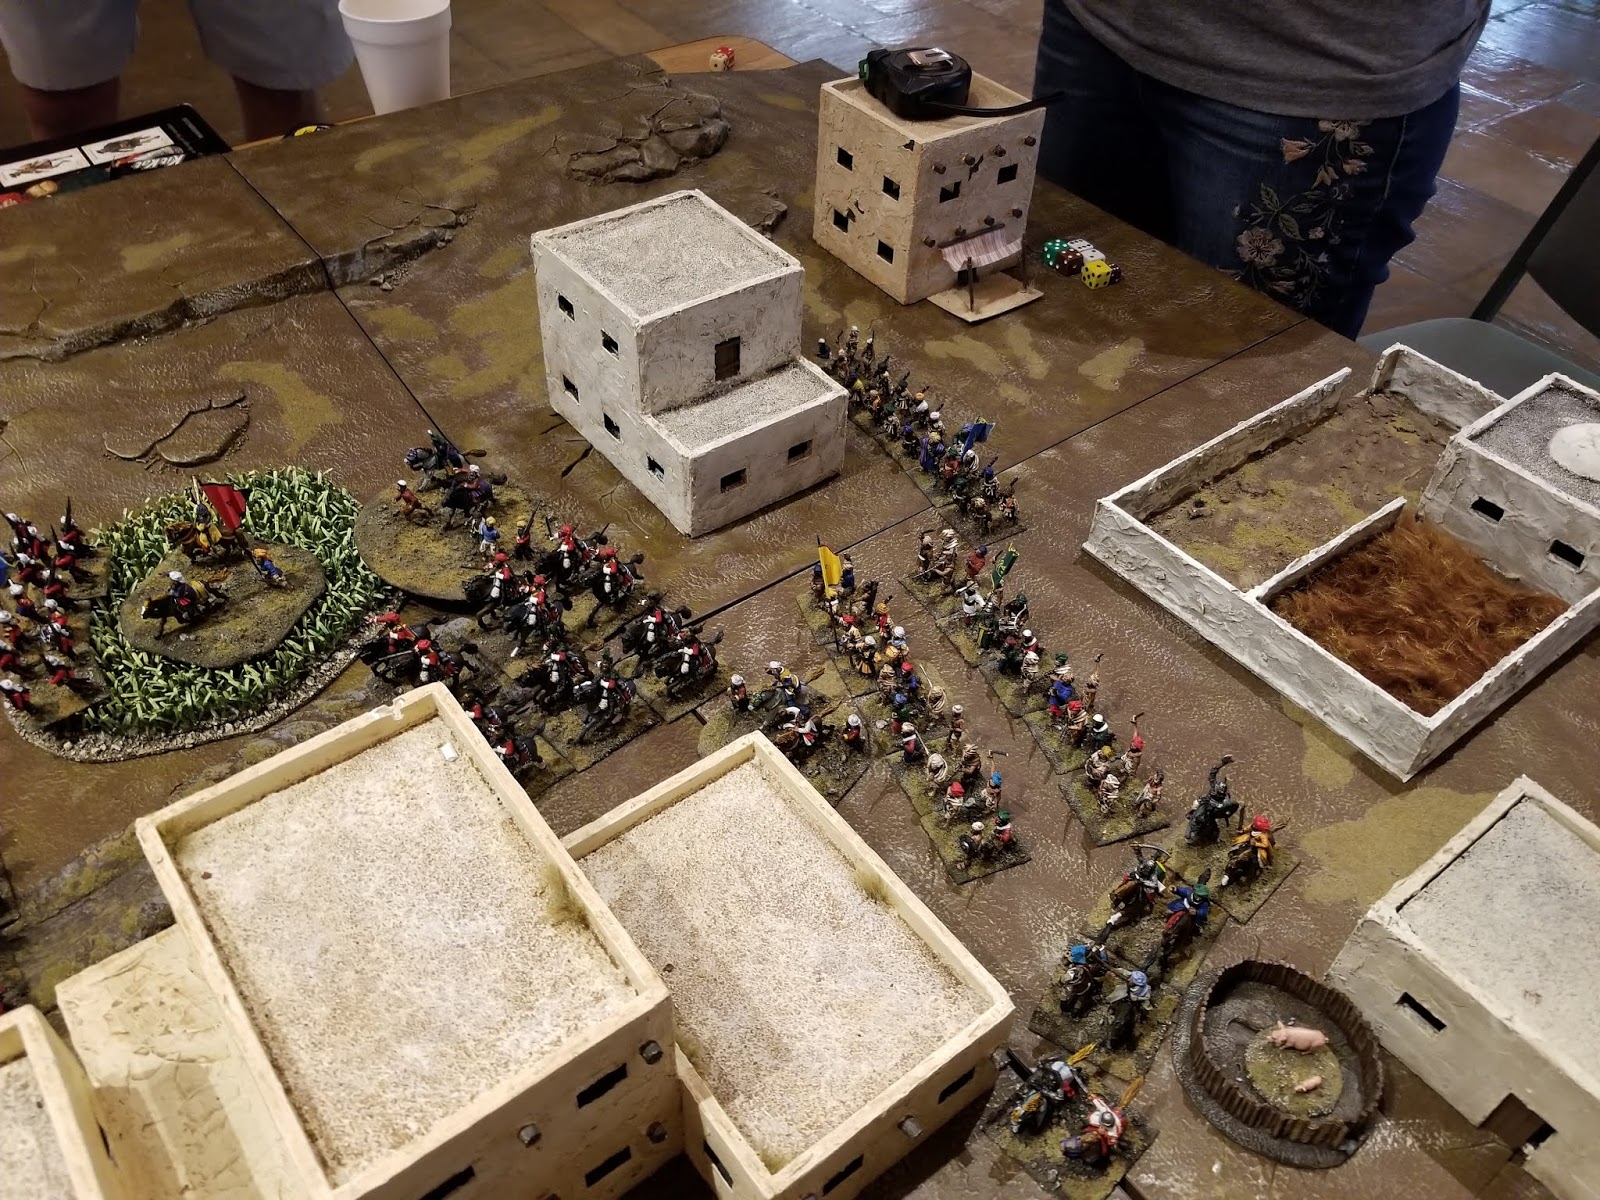
The board, pre-battle.  My guess is 12' x 6'. 

 Col. Simcoe was there to command the Queen's Rangers.


 A German units moves down the road.  This caught my Cavalry Commanders attention......

Action on the British left.  Hessians advance into a farm to face off with the French.  Even though Nobody was expecting the Spanish Inquisition, their presence was felt.

 On the British right Col. Simcoe moves his skirmisher screen into a field as his other units begin to advance against my Wife's command.  Bad move Col. Simcoe....she rolls well...

 I told you that German unit on the road caught my Cavalry Commander's eye.  Caught General Washington's too.....

 British Light Infantry on the left really piss off the lady who owns the farm.....

 The French exchange volleys with the Hessian screen.  Yes, there are a couple of "turncoats" in the Hessian force.....

 On the British right, The Queen's Rangers accurate musket fire forces the Americans to pull back...

As the American Cavalry was preparing to charge down the road, they were rudely interrupted by British Cavalry.....who paid the price.....

Hessians swing into action again the French.  Who refused to leave the "safety" of the fence.....

The German Commander steels his men's nerve against the threatened American Cavalry charge.  Which never happened.  I went after easier targets after my Wife softened them up....

Indian allied to the British work their way through the woods.

The British right flank advances.

The center as seen from the British lines.

The battle in the farm.  Yes, there is a baby on the roof......

The Queen's Rangers made a good showing of themselves.

     After much musket fire and cold steel charges the American-French forces won the day.  A HUGE thank you to Bob for all the work he did in painting and preparing so we could enjoy this game!! 😃
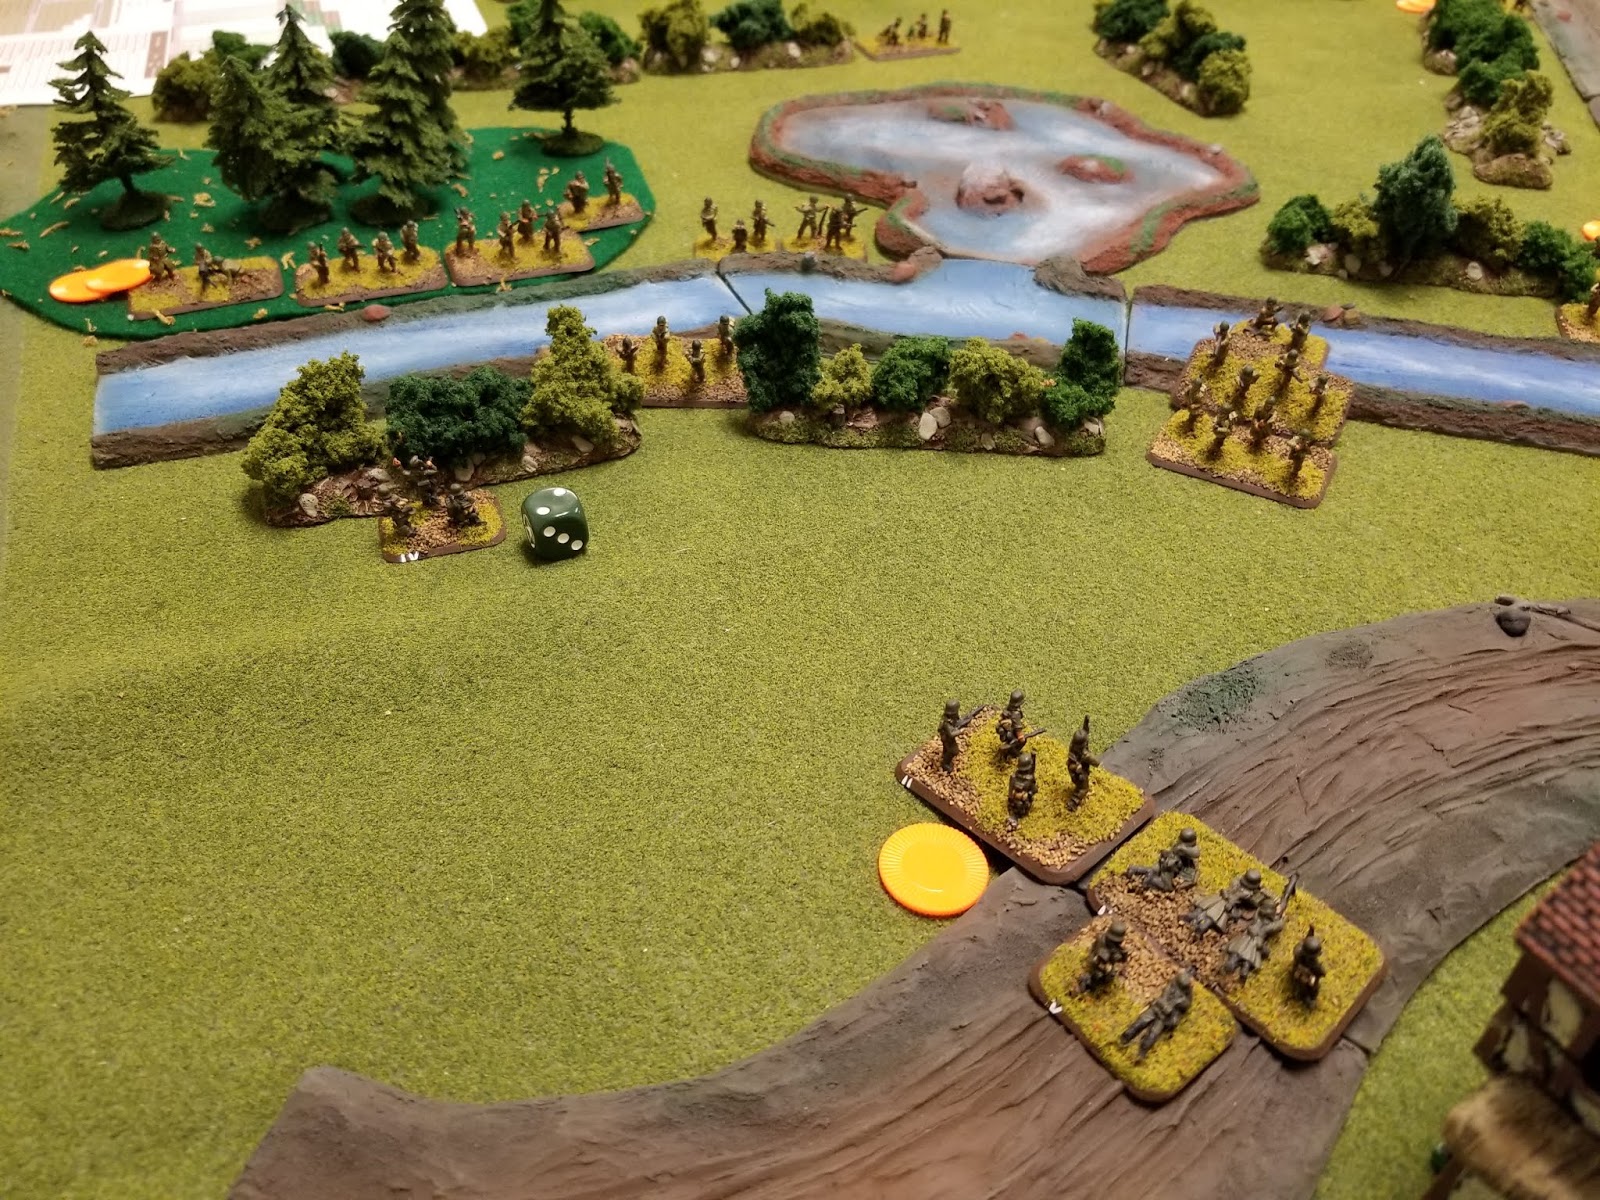
Sunday, November 5, 2017

Ft. Meigs "World at War" AQMF 2-parter

The HMGS-GL club, the "Colby St. Irregulars" host their fall "World at War" game day at Fort Meigs in Perrysburg on 11/4.  I took my All Quiet on the Martian Front game as it is usually a crowd pleaser.  My personal life has been a bit chaotic as of late, so I was planning on running some old scenarios...but I woke up at 6am the morning of the event with a scenario idea!!

And I think it worked well.....

It was a two part game; First, 3 Martian Assault and 3 Scout Tripods would start on the far  board edge and race across the board exiting what they could to get set for the attack on a US Army camp (scenario two).  

A small US Armored patrol; Command Tank, two Mk. II and one Mk. III tank units and a 'Rough Riders" unit would enter at the 3 foot mark of a side edge and would engage.  

The Martians were given their objective, the US Players no details, they were on a patrol hunting whatever they came across.......

To start I had just 4 players; the Kevin and Matthew Father / Son team took the Martians (Matthew being the infamous Martian Overlord in the The Night the Ground Exploded game from a few years ago.

http://pzgeneral08.blogspot.com/2015/08/aqmf-night-ground-exploded.html

The Human players were John and Bryan.

The Martians didn't start out so well, Kevin and Matthew splitting their forces, and with Kevin being closest to the Human entry point he took the brunt of the fighting.  His son Matthew took the instructions of "get off the far board edge" to heart and just took off running, not fighting and letting his Dad get beat on. It wasn't until the second to the last turn that he realized he could move and face, shoot at something, then move toward the objective edge....

End of turn one, Martians and Humans on the board.  One the Human first turn they ran the Rough Riders out and immobilized a Scout Tripod.......


Kevin got in trouble.  The immobilized Scout was destroyed, and Assault Tripod scored a hit but was then knocked out.  His 'Black Dust' Tripod was also lassoed by the motorcycles, but was able to break free and took out 2 stand of Rough Riders and two tanks with Black Dust.  He bought time for Matthew to run for the board edge before eventually getting blasted.....

When Matthew exited the board I reset some of the terrain, adding a small trench line and some additional Human units.  I did a quick measurement of the remaining Human units from Game one and decided the survivors would enter behind the Martians (i.e. were in pursuit) on turn 4. 

To the Martians I gave Kevin a Scout back (I felt bad for him) and removed all of the damage Matthew's Tripods had received.  The plan was to add additional Martian units coming onto the board in a flanking maneuver.  Another player, Todd, showed up so Kevin and Matthew allowed him to the Turn two reinforcements, the 'Red Martian' and a Slaver Tripod with 6 Drones.  They came in about the 3 foot mark of a side edge on turn 2.

By turn two Matthew's usual tactic of running head long into the teeth of the Human guns paid off it's usual dividend: a burning Tripod.  Kevin looks like he's sleeping, but he's moved his Scout into a position on the road to blast away at the Human armor.  Human infantry stalking about in the woods gives the Red Martian no cause for alarm......

 
Matthew scored some hits on the Michigan 'Iron Brigade'; two dead and one routed.  His Scout moved off camera to the left behind the trenches, causing the Humans to pull some armor back to try and deal with it (upper left in the photo)
 
Then it happened.  As the US Infantry held off the Red Martian and Slaver / Drones, a Clamper tank shot out and latched onto Kevin's Scouts leg.  It was now immobilized for the rest of the game.....but at least it's Heat Ray was pointed in the right direction!!


Kevin's Scout was eventually destroyed, Catastrophically one might add!!  Unfortunately for the Martians only the abandoned Clamper tank was also destroyed in the blast....With the US Infantry destroyed the Slaver and Drones closed in.


The Red Martian and Slaver / Drones began clean up operations.  About this time the pursuing US Armor arrived and put a serious smack down on the Slaver.  They pounded it and caused 8 out of a possible 10 armor hits!!  YIPE! YIPE! YIPE!!!!

With session time running out the '10:05' rule was put into effect (last turn, kill it all).  The Human Armor moved into the middle of the remaining Martians trying to overwhelm them with dice thrown.  They eventually did destroy the Slaver, shutting down all the Drones.  The Martians ran an Assault Tripod into their midst hoping to sweep a Heat Ray and then go up in a blaze of Catastrophic damage...but it was only destroyed......
The game did end with me declaring a marginal Human victory.  Only the Red Martian survived for the invaders and 4 or 5 Human units survived...but all were missing stands / vehicles........

And with much hoot'n and hollar'n......a good time was had by all......